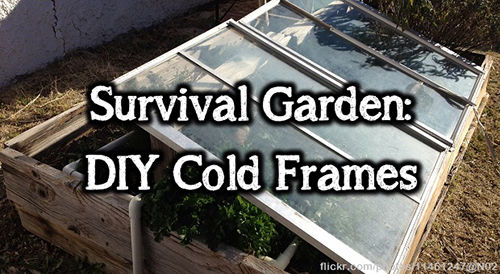
Today’s article is aimed at preppers who aren’t lucky enough to live in warm or temperate climates yet are willing to try to grow their own survival garden.

How To Make Cold Frames
Cold frames are basically mini-greenhouses and they work by collecting natural warmth to take care of your seedlings in the spring, and to keep your organic veggies alive and kicking through the fall and winter.
Basically, if you want to grow your own survival garden regardless of your climate (well, ALMOST regardless), keep reading folks.
Unlike a regular greenhouse, a DIY cold frame project requires less space, less work and less spending.
Being a do-it-yourself thingy for those of you working on a tight budget or a small scale operation, I will try to enlighten you about how to use readily available materials from around your homestead for protecting your survival garden during the cold months of the year.
To put it simply, a cold frame can be described as a regular box, featuring a transparent cover or a lid, which works by passively collecting the energy from the sun and also acts as a reservoir for your tender plants, seedlings and what not.
Just like a solar panel, the energy radiated by the sun heats the soil and the air inside the box and during the night, the absorbed energy (in form of heat) is released, keeping your mini-survival garden alive and well.
Cold frames are very useful especially early in the spring, when they provide an optimal environment for starting your veggie seedlings or transplanting the annual flowers you’ve already started indoors.
Basically, almost any type of seed can be started directly inside the frame and developed in a controlled environment until it can be safely transplanted outdoors, in your garden.
During hot summer months, the lid may be replaced by using shade lath or cloth, thus providing something like a nursery of sorts for rooted cuttings.
Now folks, everything in life seems to be about location, and the same theory applies to DIY-ing cold frames. You should choose a well-protected site for your DIY project to keep it safe from harsh winds. Choose a spot near shrubs, trees, a wall or a fence. Also, make sure you choose a place which is exposed to sunlight as long as possible during the day, and that your cold frames are oriented properly, to face southwest or south.
Another trick is to sink the frame ~10 inches into the ground, thus maximizing its heat-retention capability. Be advised that your desired location should have good drainage so that you avoid rain water collecting around your frame.
How to Build a Cold Frame
Next, let’s take a look at the basics of DIY-ing cold frames. Let’s start with the obvious: the dimensions. Since the most important thing in a cold frame is the transparent cover/lid, start by selecting your desired cover, as its dimensions will determine the frame’s dimension.
The best choice (and also the cheapest) would be to recycle an old storm window or a window sash; you may even have one in the attic or in the shed – go check it out. If the “going gets tough”, you can always use an old shower door. There’s little to no difference between all these options. Any of them would do just fine for your DIY cold frames project.
If you can’t find anything laying around, go cruising garage sales, keeping an eye out for recycled windows and things of that nature. If you’re skilled enough and patient, you can even build a cover by sandwiching fiberglass sheets or clear acrylic between strips of wood (the corners should be strengthened using metal plates). Even polyethylene film can be used, carefully stapled to a wooden frame. All of these methods are quick and cheap, but will only last for a limited amount of time. They’ll be good for about a year or so.
If you’re using old windows, make sure they’re not covered with lead-based paint (lead is very toxic and lead poisoning is a no fun). Also, check the wood for signs of rot and make sure that the glass is firmly secured in its wooden frame.
For those of you living in the extreme North, where below zero temps and heavy winter snows are on the menu for 3-4 months every year, you should stay away from glass covers, because the accumulation of snow will almost certainly break your glass covered cold frames.
In such areas, the best options are thick sheets of window-strength plastic, such as Lucite. There are other brands, some better, including Lexane, which are extremely resilient against elements, such as ice, snow, sleet and rain.
Some professional gardeners are using 4×8-foot panels made from corrugated fiberglass for their cold frames. These are sold for building green house walls, so they’re as tough as they come and made exclusively for this job, but they’re relatively expensive.
However, the corrugated fiberglass panels let tons of light inside and, most importantly, they’re durable and they don’t turn yellow after prolonged exposure to sunlight; hence they’re ideal if you want to build a cold frame that lasts for years and years. If you look at the cost from that point of view, they’re actually not that expensive.
Keep the cover as light as possible so that it’s easy to lift and try not to make it too wide to allow for easy access to the plants inside the cold frame. Two or three feet of width would be as small as you’d probably want to go, while a length of four feet will allow you to grow almost any variety of plant inside while still being able to handle the lid without too much difficulty.
The frame itself can be built from scrap lumber, a cheap and readily available material. You can also use cedar, cypress or redwood (they’re naturally rot-resistant) or even dirt cheap plywood. Stay away from toxic materials, such as pressure treated wood, which may contain (almost surely) highly toxic substances, such as arsenic.
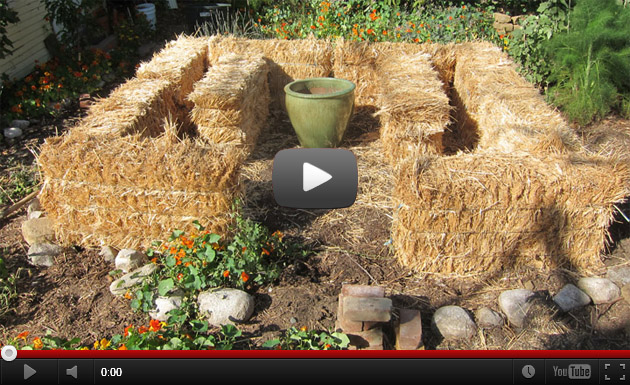
The simplest and maybe the cheapest frame can be built using straw bales. All you have to do is to arrange 4 bales of straw or hay into a nice square shape, the bales being basically the sides of your DIY cold frame project.
=>STRAW BALE GARDENING: SMART REASONS TO GROW MORE FOOD IN LESS SPACE WITH LITTLE EFFORT
The transparent cover/lid goes on top of the bales (a plastic cover or a sheath of glass) and that’s about it. The straw can be used next spring for mulch after you finish with your frame and disassemble it.
If you’re making this a more permanent cold frame project, i.e. lumber-made frames, remember that the edges of the box should be weather-proofed using weather stripping on the top edges. Also, try to use galvanized steel hinges for attaching the cover/lid.
Remember to slope the frame with at least a 6-inch slope from the back to the front of the box for trapping as much heat as possible and to allow the rain water to run off. Vertical posts should be used for reinforcing the corners of the box to lend additional strength.
Another option for a permanent and very solid DIY cold frame project is to build the side walls from stone and mortar. Stone walls will definitely require more work and skills, but if you have these materials on your property, they can be very cheap, and you’ll learn a thing or two in the process (like pouring concrete, making mortar etc).
An interesting alternative for your cold frame side walls are cinder blocks, if you have them around your homestead and/or you can’t get your hands on bales of hay, straw, lumber or whatever. Cinder blocks are extremely durable and they insulate very well; just remember to arrange them in such a way that the holes point up and down or else the air will circulate freely.
Remember to keep the top holes covered, to keep your frame warmer during the coldest months of the year. You can also fill them with dirt to insulate them further.
If cinder blocks aren’t your thing, you can always use PVC to make a cold frame. The frame is built using PVC piping and a thick, strong sheet plastic for cover. This type of cold frame design is extremely light and portable, and also dirt cheap.
To prevent overheating, which translates into dead plants just as quickly as freezing does, make sure that you properly ventilate your cold frame. Proper ventilation is possibly the most important consideration when it comes to growing a survival garden inside a cold frame.
For keeping track of the temperature fluctuations, you should install a min-max thermometer. If the heat inside the frame reaches/exceeds 70 to 75 degrees Fahrenheit, be ready to prop open the lid using a dowel or a sturdy stick. In the afternoon you must close the lid, for trapping the heat inside.
Remember to make notches on your prop stick. This way, you’ll be able to prop open the top cover at various heights, in correlation with the outside temperature.
As a high-tech option, you may use an automatic vent in your cold frame design, which opens and shuts your cold frame automatically when the desired temperatures are achieved.
However, the automatic vent is only usable if you live in a temperate geographical area, where snow is a rare occurrence, because accumulated snow on the lid will render the auto-vents useless, as they’re not strong enough to cope with the additional weight.
If the weather gets very cold, be prepared to drape the frame using a piece of carpet or an old blanket for additional insulation.
The last question we need to answer is: what can you grow inside a cold frame? The answer to that question is “anything you grow in your regular garden”. People commonly sow seeds of lettuce, spinach, choy and kale in cold frames during the fall months in order to enjoy them in the winter.
Also, in certain areas where the growing season is very short, your only chance of growing warm weather crops is a cold frame.
Take a look at the first tutorial, which details a cold frame DIY project step by step and than the second one which shows a 4×8 over a raised bed.
Video first seen on Fine Gardening
Video first seen on Bill Farmer
I hope the article helped and if you have suggestions or comments, feel free to express yourself in the dedicated section below.
This article has been written by Chris Black for Survivopedia.
Our grandfathers and great-grandfathers were the last generation to practice the basic things that we call survival skills now. Having the skills to survive without modern conveniences is not only smart in case SHTF, it’s also great for the environment. Keep in mind that the key to a successful homestead does not only lie on being able to grow your own food but on other skills as well. Learning these skills will take time, patience and perseverance, and not all of these skills are applicable to certain situations. Hopefully, though, you managed to pick up some great ideas that will inspire you and get you started! Just like our forefathers used to do, The Lost Ways Book teaches you how you can survive in the worst-case scenario with the minimum resources available. It comes as a step-by-step guide accompanied by pictures and teaches you how to use basic ingredients to make super-food for your loved ones.
____________________________________________________
CHECK OUR survival and prepping solutions
If you found this article useful, please like our Facebook page and stay up to date with the latest articles.
WHAT TO READ NEXT:
A RETURN TO THE OLD PATHS: HOW TO MAKE PEMMICAN LIKE THE NATIVE AMERICANS
20 LOST RECIPES FROM THE PIONEERS: WHAT THEY COOKED IN THEIR JOURNEY WESTWARD
SEVEN CLASSIC GREAT DEPRESSION ERA RECIPES GRANDMA USED TO MAKE
POTTED MEAT: A LOST SKILL OF LONG TERM MEAT STORAGE
BACK TO BASICS: HOW TO MAKE AND PRESERVE LARD
THE BEST WAY TO STOCKPILE VEGETABLES OFF-GRID
OLD FASHIONED PRESERVING-GRANDPA’S RECIPE FOR CURED SMOKED HAM
HOW TO MAKE GUNPOWDER THE OLD FASHIONED WAY
SURVIVAL HERBAL RECIPES FROM OUR ANCESTORS
OTHER USEFUL RESOURCES:
The 3 Pioneer Survival Lessons We Should Learn
The Most Effective Home Defense Strategies
Old School Hacks for Off-Grid Living
The Medical Emergency Crash Course
The Smart, Easy Way to Food Independence
How to Survive the Coming 100 Years Long Drought
About Chris Black
Chris Black is a born and bred survivalist. He used to work as a contractor for an intelligence service but now he is retired and living off the grid, as humanly possible. An internet addict and a gun enthusiast, a libertarian with a soft spot for the bill of rights and the Constitution, a free market idealist, he doesn’t seem very well adjusted for the modern world. You can send Chris a message at editor [at] survivopedia.com.


