When SHTF, even the most prepared of us may find themselves separated from their prepped stores, and out on their own. All of our planning can go south quickly, and we may find ourselves fleeing danger with little more than the clothes on our back. It can happen to anyone.

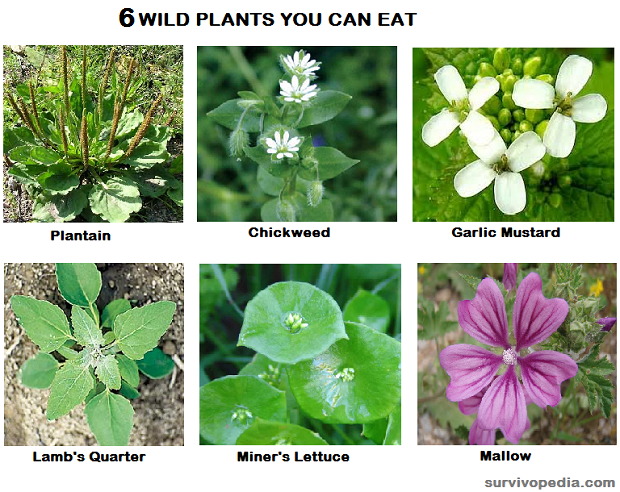
Depending on what you’ve managed to escape with, triaging your needs (once safe) must be the first priority. Food is on top 3 priorities, and for that reason looking for edible plants in the woods is one skill to learn for survival.
How To Test Wild Edibles In 3 Steps
Rule of Three’s
When triaging needs, remember the “rule of three’s.”3 hours without protection from the cold, 3 days without water, 3 weeks without food. Most camping/wilderness deaths are caused by hypothermia: in a cold environment without the proper shelter or clothing to keep you warm, hypothermia can cause death in as little as 3 hours.
Remember, temperatures usually drop at night, often significantly. Just because it was warm during the day doesn’t mean that it will stay that way out of doors at night. If you feel it getting cooler as the sun begins to set, or you know cold is coming, find some warm clothes, a blanket, and make yourself some form of shelter to retain your body heat.
Once that’s covered, next comes water. You can survive without water for up to 3 days. But your demand for water increases when you perspire, and during times of high stress. Water will be a high priority if you don’t have enough.
The body can survive for up to 3 weeks without food (not true for diabetics).
And although 3 weeks might sound like you have plenty of time to get by, and that you might not need to worry immediately, think again.
If you’re used to eating regularly, like most of us are, it won’t take long before that hunger will impact your judgment.
24-48 hours without food, and you can expect to feel lightheaded, fatigued, and possibly even dizzy. It’s not fun. So while your need for food might be the least immediate of the three, it is definitely a priority.
Warnings to Keep in Mind when Looking for Edible Plants
Many plants are poisonous, and eating a toxic plant can cause reactions within the body ranging from relatively mild, like vomiting, to the more severe — organ failure, coma, and eventually death. One of the safest methods to determine if a plant is safe to eat is to use the “Universal Edibility Test” developed by the U.S. Army.
But before we get into how to test a plant, there are a few general tips to consider first.
Don’t even consider testing a plant that there isn’t a lot of. You’re taking a risk by testing and eating it, and you want to make sure you’re not going through all this trouble (and potentially death) unless you can make several meals from it. If it’s just one small outcropping, make a mental note of its location, and move on. Try to find a more abundant resource.
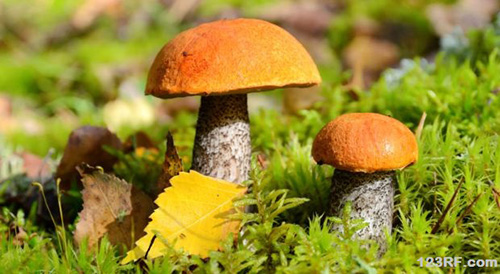
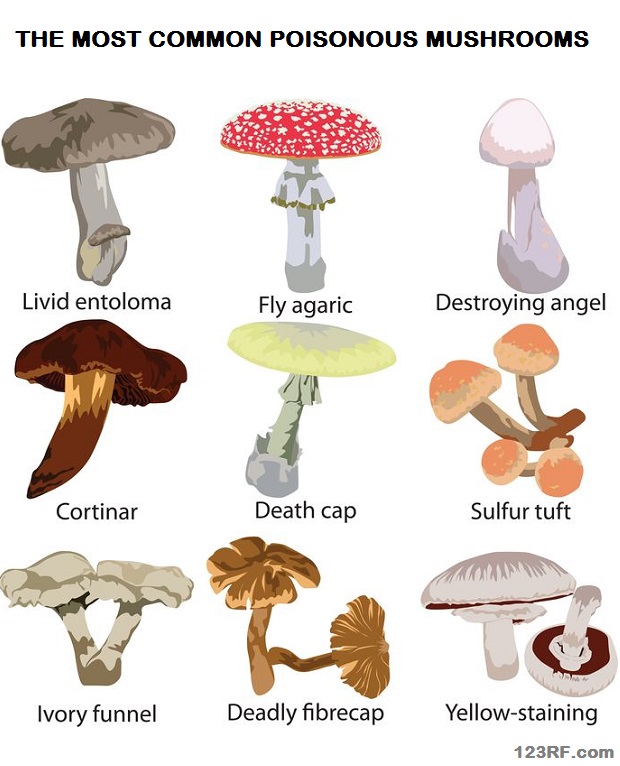
Never eat mushrooms or fungi. Period. I know some mushrooms are really tasty. But unless you REALLY know what you’re doing, eating the wrong mushroom will cause you permanent, sometimes fatal, injury. And it’s not possible to test mushrooms or fungi with the Universal Edibility Test because a toxic mushroom will affect your nervous system. These effects won’t show up for days, and by the time they do, there’s no treatment. Just avoid all mushrooms.
Don’t eat plants grown in polluted areas. Avoid roadside plants because car exhaust and other chemicals like antifreeze are more abundant at the roadside and could have contaminated the plants growing there.
Same goes for plants growing near a polluted water source. Do not eat anything that’s growing in brackish, murky, stagnant, or smelly water or soil. When a plant grows in or near contaminated water, the plant itself becomes contaminated.
Basically, if it’s growing someplace where you wouldn’t want to step, or in something you wouldn’t want to get on your face because of its smell, avoid it!
Say NO to anything that’s rot, mold, soft. Anything that’s rotting, moldy, or overly soft (like before rotting) is a definite avoid. Yes, blue cheese is mold, but mold in general is not your friend. Most biological weapons programs start with mold. If it’s moldy or mildewed, stay away!
Some other general “avoid this” type of indicators are:
- milky or discolored sap,
- beans, bulbs, or seeds inside pods,
- bitter or soapy taste,
- spines, fine hairs, or thorns.
If you come across a plant that smells a little bit like almonds, it could contain cyanide. Avoid.
If the leaves are shiny, and/or grouped in three’s, it’s likely poison ivy, and you’ll want to steer clear. Some folks will say certain colored berries are OK to try. But unless you’re sure you’re eating a blackberry, raspberry, or blueberry, I’d give these a pass.
Boiling can help remove some bitterness, but isn’t very effective at removing toxins if the plant is poisonous. Don’t think boiling a toxic plant will make it edible. It won’t. And before you risk your health by testing an unknown plant, if there’s meat available, stick to eating meat.

The Universal Edibility Test
You’ve found an abundant plant, away from the road and other sources of contamination, and you want to test it. The following is from The U.S. Army Survival Manual FM21-76. It’s important to note that while this test comes from the U.S. Army, there are experts who don’t believe this test is effective, because some plants can cause serious adverse reactions simply from skin contact.
And even this Army manual emphasizes the importance of knowing and being able to identify the edible plants in your area, and having a field manual to help do so, so as to not need to perform this test. But when SHTF, this is probably better than starving.
Use with caution, and use common sense. You’ll need to fast for 8 hours before testing a plant. Remember to pick something abundant, so you’re not potentially wasting your time (and risking your life) for a light snack.
Some parts of a plant can be poisonous, while others aren’t. For example, a plant can have poisonous leaves, but the roots and stalks might be fine. So take the plant apart into its main components.
1. Skin Contact Test: Crush up the part of the plant you want to eat — only the one part, like the leaves OR the stalk, for example — and rub it on the inside of your wrist or elbow for 15 minutes. Once that’s done, watch the area for the next 8 hours (during which time you can only drink water – no food). If there’s any reaction like redness, bumps, burning, pain, itching, etc, you don’t want it inside your stomach.
If after 8 hours your skin is still fine, then it’s on to step 2. Hold the plant to your closed lips for 3 minutes. If you feel any tingling, burning, itchiness, really any unusual reaction, toss this part of the plant and start over with another part.
If there’s no lip reaction, place the plant on your tongue for 15 minutes. Again you’re looking for any weird sensations. Any tingling, burning, itching, etc. spit it out, rinse out your mouth, and move on to another part of the plant. Just because it tastes bad, or bitter, doesn’t necessarily mean it’s bad for you. You’re looking for a reaction to know if it’s safe to continue or not. When in doubt, spit it out. And move on.
2. The Chew Test: Now you can chew up this plant part in your mouth — but don’t swallow. Hold the chewed up plant in your mouth for 15 minutes, looking for any of the earlier mentioned reactions.
If you react badly to it, spit it out, rinse your mouth out with water, and press on. If 15 minutes pass and you’re still good, swallow what’s in your mouth. If you feel nausea, or any ill effects, you need to make yourself vomit and then drink plenty of water. After you’ve swallowed, wait 8 hours to test it properly. You can have water during these next 8 hours, but no other food.
3. The Bigger Bite: If the plant passes the test over the next 8 hours, and you’ve had no ill effects, try eating about 1/4 cup of the plant part. Wait another 8 hours, drinking only water. Eat no other food. This is the final stage of the test. If you’ve made it to the end of the 8 hours and your fine, then the plant part (only the part you tested) is safe to eat.
You’ll need to repeat the full test with every other part of the plant, if you want to eat it.

Other Things to Expect
Most wild edible plants will taste less bitter when they’re young. The more mature the leaf, the more bitter it will generally taste. Boiling offers some relief from the bitterness. But some plants you might want to boil multiple times.
Many edible plants are rich with anti-oxidants, and have been a staple of many native diets for centuries.
Being able to identify the plants in your area before there is the need, is the best preparation for finding edible plants.
Disclaimer: This is not meant as a field guide, and before you eat (or test) an unknown plant, do your best to follow the general guidelines from the Army Survival Manual detailed above, use common sense, and be careful.
This article has been written for Survivopedia.com by Joe Touchstone, a.k.a. “Slightly Irregular Joe” of survivalprepper-joe.com.
Our grandfathers thrived having this knowledge. Being able to feed your family in a SHTF scenario just foraging for wild edibles can make the difference between life and death. All their knowledge is now gathered in one place…The Lost Ways…your best investment towards self-sufficiency, survival in the wild, surviving an economic collapse or an EMP that can wipe out our power grid and send up back to the 19th century.
Here’s just a glimpse of what you’ll find in The Lost Ways:
From Ruff Simons, an old west history expert and former deputy, you’ll learn the techniques and methods used by the wise sheriffs from the frontiers to defend an entire village despite being outnumbered and outgunned by gangs of robbers and bandits, and how you can use their wisdom to defend your home against looters when you’ll be surrounded.
Native American ERIK BAINBRIDGE – who took part in the reconstruction of the native village of Kule Loklo in California, will show you how Native Americans build the subterranean roundhouse, an underground house that today will serve you as a storm shelter, a perfectly camouflaged hideout, or a bunker. It can easily shelter three to four families, so how will you feel if, when all hell breaks loose, you’ll be able to call all your loved ones and offer them guidance and shelter? Besides that, the subterranean roundhouse makes an awesome root cellar where you can keep all your food and water reserves year-round.
From Shannon Azares you’ll learn how sailors from the XVII century preserved water in their ships for months on end, even years and how you can use this method to preserve clean water for your family cost-free.
Mike Searson – who is a Firearm and Old West history expert – will show you what to do when there is no more ammo to be had, how people who wandered the West managed to hunt eight deer with six bullets, and why their supply of ammo never ran out. Remember the panic buying in the first half of 2013? That was nothing compared to what’s going to precede the collapse.
From Susan Morrow, an ex-science teacher and chemist, you’ll master “The Art of Poultice.” She says, “If you really explore the ingredients from which our forefathers made poultices, you’ll be totally surprised by the similarities with modern medicines.” Well…how would you feel in a crisis to be the only one from the group knowledgeable about this lost skill? When there are no more antibiotics, people will turn to you to save their ill children’s lives.
And believe it or not, this is not all…
Table Of Contents:
Making Your Own Beverages: Beer to Stronger Stuff
Ginger Beer: Making Soda the Old Fashioned Way
How North American Indians and Early Pioneers Made Pemmican
Spycraft: Military Correspondence During The 1700’s to 1900’s
Wild West Guns for SHTF and a Guide to Rolling Your Own Ammo
How Our Forefathers Built Their Sawmills, Grain Mills,and Stamping Mills
How Our Ancestors Made Herbal Poultice to Heal Their Wounds
What Our Ancestors Were Foraging For? or How to Wildcraft Your Table
How Our Ancestors Navigated Without Using a GPS System
How Our Forefathers Made Knives
How Our Forefathers Made Snow shoes for Survival
How North California Native Americans Built Their Semi-subterranean Roundhouses
Our Ancestors’Guide to Root Cellars
Good Old Fashioned Cooking on an Open Flame
Learning from Our Ancestors How to Preserve Water
Learning from Our Ancestors How to Take Care of Our Hygiene When There Isn’t Anything to Buy
How and Why I Prefer to Make Soap with Modern Ingredients
Temporarily Installing a Wood-Burning Stove during Emergencies
Making Traditional and Survival Bark Bread…….
Trapping in Winter for Beaver and Muskrat Just like Our Forefathers Did
How to Make a Smokehouse and Smoke Fish
Survival Lessons From The Donner Party
Get your paperback copy HERE
CHECK OUR survival and prepping solutions
If you found this article useful, please like our Facebook page and stay up to date with the latest articles.
WHAT TO READ NEXT :
HOW TO BUILD AN EARTHSHIP HOUSE ( PROS AND CONS )
HOW TO BUILD AN BULLETPROOF EARTHBAG DOME FOR $300
TOP 20 LOW-COST DIY GARDENING PROJECTS MADE WITH PVC PIPES
HOW TO BUILD A SMOKEHOUSE IN YOUR BACKYARD (WITH PICTURES)

2 Replies to “How To Test Wild Edibles In 3 Steps”