We all have that one family dish that we’re known for, the one that was passed down to us from our ancestors.It may be a dip, or a cake, or your grandma’s meatloaf, but if I ask you what your favorite family recipe is, I almost guarantee something instantly comes to mind, and odds are good that we even have it committed to memory.
My family is full of cooks, though traditionally most of them are women.
My former father-in-law Max, on the other hand, probably taught me more about cooking than I ever learned from my family, because he taught me the WHYs of cooking, not just the hows. He taught me how to make all of my grandmothers’-and of course his-recipes come out right every time. Even if they don’t, I have a good idea of what happened.
So, which is MY favorite family recipe?
There’s no way that I can pick just one, so I asked many people across my various venues what they thought, and there were a few good old American recipes that just kept cropping up time after time. You can find some of them in my book, Forgotten Lessons of Yesterday.
But for now, in no particular order, here are the top recipes that I came up with.
5 Classic American Recipes We All Love
Apple Pie
We would be absolutely remiss if we didn’t start with the one food that has a place at any holiday, picnic, or any other event where people gather to eat, drink, and be merry: apple pie!
There are about a million different variations on the recipe, but the traditional, lattice-work pie is the one that instantly jumps to mind.
I’m going to share three tips here that Max taught me for a flaky, fabulous crust – use very cold water, add a ½ tsp of vinegar to your water, and butter is king. My grandma used lard, back when it was readily available because they made it.
Many people turn to Crisco, which is fine, but lacks flavor and is hydrogenated. The flavor of butter is incredible and the texture is light and flakey.
Dough:
- 4 1/2 cups all-purpose flour
- 4 tsp. sugar

- 1/4 tsp. fine salt
- 1 ¾ stick cold butter, diced
- 1 large egg, lightly beaten with 2 tbsp. ice cold water
Filling:
- 2 tbsp. freshly squeezed lemon juice
- 3 lbs. baking apples like Golden Delicious or Granny Smith
- 2/3 cup sugar, plus more for sprinkling on the pie
- 1/2 stick unsalted butter
- 1/4 tsp. ground cinnamon
- 1/8 tsp. ground nutmeg
- 1 large egg, lightly beaten
Directions
To make the dough by hand:
Whisk together the flour, sugar and salt in a medium bowl. Using your fingers, work the butter into the dry ingredients until it resembles yellow cornmeal mixed with bean-size bits of butter. (If the flour/butter mixture gets warm, refrigerate it for 10 minutes before proceeding.)
Add the egg and stir the dough together with a fork or by hand in the bowl. If the dough is dry, sprinkle up to a tablespoon more of cold water over the mixture.
To make the dough in a food processor:
Pulse the flour, sugar and salt in a food processor fitted with the metal blade until combined. Add the butter and pulse until it resembles yellow cornmeal mixed with bean-size bits of butter, about 10 times.
Add the egg and pulse 1 to 2 times; don’t let the dough form into a ball in the machine. (If the dough is very dry, add up to a tablespoon more of cold water.) Remove the bowl from the machine, remove the blade and bring the dough together by hand.
Form the dough into a flat circle, wrap in plastic wrap, and refrigerate until thoroughly chilled, at least 1 hour.
For the filling:
Put the lemon juice in a medium bowl. Peel, halve and core the apples. Cut each half into 4 wedges. Toss the apple with the lemon juice. Add the sugar and toss to combine evenly.
Melt the butter over medium-high heat in a large skillet. Add the apples and cook, stirring, until the sugar dissolves and the mixture begins to simmer, about 2 minutes. Cover, reduce the heat to medium-low and cook until the apples soften and release most of their juices, about 7 minutes.
Strain the apples in a colander over a medium bowl to catch all the juice. Shake the colander to get as much liquid as possible. Return the juices to the skillet, and simmer over medium heat until thickened and lightly caramelized, about 10 minutes.
Toss the apples with the reduced juice and spices in a medium bowl. Set aside to cool completely. (This filling can be made up to 2 days ahead and refrigerated or canned, or frozen for up to 6 months.)
To assemble the pie:
Cut the dough in half. On a lightly floured surface, roll each half into a circle 11 to 12 inches wide. Layer the dough between pieces of parchment or wax paper on a baking sheet and refrigerate for at least 10 minutes.
Line the bottom of a 9-inch pie pan with one of the discs of dough, and trim it so it lays about 1/2 inch beyond the edge of the pan. Add the apple filling to the pan.
Cut the second round into 1/2-inch thick strips. Lay strips of dough, evenly spaced, across the entire pie. Weave more strips of dough perpendicular through the previous strips to make a lattice or basket weave design across the entire pie. Trim the excess ends from the strips of dough.
Pinch the bottom crust edge and lattice edge together, and flute the edge as desired. Make sure that the lattice is closed around the edges so that the filling doesn’t boil out. Brush the surface of the dough with egg and then sprinkle with sugar. Refrigerate for at least 30 minutes.
Bake the pie on the preheated baking sheet until the crust is golden, 50 to 60 minutes. Cool on a rack for at least 3 hours before serving. The pie keeps well at room temperature (covered) for 24 hours, or refrigerated for up to 4 days.
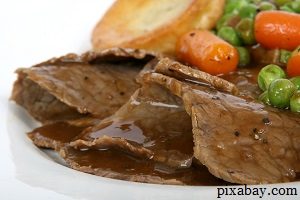
Pot Roast
America is a place where nationalities blend and merge to create a new, unique set of ideals and goals. As such, our recipes are a beautiful hodge-podge of different ethnicities, intertwined and adjusted to make them as American as we are. There’s probably nothing that represents that better than the good old pot roast!
Like every other recipe on the list, there are a million variations, but here’s mine.
- 3-5 lb. chuck roast

- 2 medium onions
- 2 pounds baby carrots
- 5 medium potatoes
- 1 tbsp. salt
- 2 tsp. black pepper
- 2 tsp Italian seasoning
- 1 tbsp. olive oil
Preheat oven to 275 degrees. Heat olive oil in your Dutch oven on medium heat and sear each side of the roast. Remove roast. Add onions and sear on each side. Remove and do the same with the carrots. Remove; pour in 3 -4 cups water.
Scrape all of the deliciousness off the bottom, then add the roast and top with the onions and carrots. Sprinkle the seasonings over the top and around the water. Put the lid on the Dutch oven and bake for an hour per pound.
Meatloaf (or amazing meatballs!)
- 3 lbs. ground beef
- 3 eggs
- 1 cup oatmeal
- ½ cup ketchup
- 3 tbsp. mustard
- 1 1/2 tbsp. Italian seasoning
- 2 tsp. salt
- 2 tsp. black pepper
- 1 tsp. onion powder
- 1 tsp. garlic powder
This one’s easy. Preheat oven to 325 degrees. Combine everything in a bowl. If it’s a little sloppy, add a bit more oats. If it’s too dry, add a bit more ketchup. You want to be moist enough to form into a loaf but not so wet that it sticks to your hands.
Ideally, you should be able to form it into a meatball that’s a little mushy. Press into a loaf pan or square iron skillet. Bake for 1 ½-2 hours until meat thermometer reads 160 degrees.
Fried Chicken
Picnics and Sunday dinners all across the South wouldn’t be the same without fried chicken. It’s crispy, crunchy, and oh-so-juicy!
Chicken:
- 8 serving pieces chicken, light or dark meat
- 2 cups milk or buttermilk
- 2 tsp. salt
- 2-3 cups peanut oil, more if needed
- 1 tsp. black pepper
- 2 cups all-purpose flour
Put oil in a large skillet (you want about an inch) and heat to 375 degrees. You’ll know it’s hot when you toss in a bit of flour and it sizzles. While your oil is heating, combine all dry ingredients in a medium bowl, and place the milk in another.
Dredge the chicken through the milk then through the flour mixture so that it’s well-coated. Drop gently into the oil. You’ll hear it sizzle. When it stops sizzling and is brown on one side, turn it and cook it on the other side.
When it quits sizzling, it’s done. Drain on paper towels and enjoy.
Buttery, Flakey Biscuits
I’m from the South, but biscuits are eaten in all parts of the south. Biscuits were a staple food for our ancestors and this recipe has been passed down to me via my father-in-law. The important part about keeping your biscuits light is to knead them only enough to combine them. Unlike bread, the more you knead biscuits, the tougher they get.
- 2 cups all-purpose flour
- 4 teaspoons baking powder
- 3 teaspoons sugar
- 1/2 teaspoon salt
- 1 stick cold butter (1/2 cup) cut into eighths
- 1 large egg
- 2/3 cup 2% milk
Preheat oven to 450 degrees. Combine all of the dry ingredients then cut the butter in until you have coarse crumbs, with no chunks bigger than a pea. The goal is to incorporate the butter throughout the flour. Then whisk together the milk and egg and add to the flour. Stir to combine, then knead no more than necessary to make it smooth.
Roll it out to about ½ inch thick and cut with a biscuit cutter or water glass. Place in a greased baking dish so that they’re touching a bit and bake 5-10 minutes or until golden brown. Serve piping hot!
If the article you’re reading provides less than you need about these old food habits, grab my book – Forgotten Lessons of Yesterday. Click the banner below for more!
Now that I’ve shared my favorite recipes with you, return the love! What’s that one recipe that’s been handed down through the generation in your family?
Let us know in the comments section below.
This article has been written by Theresa Crouse for Survivopedia.
Here’s just a glimpse of what you’ll find inside Old Time Wisdom:
– The ancient meat preservation method that will make your mouth water just thinking of the delicious  sweet-smoky taste of beef, pork, or link sausages you’ll have for months to come… without ANY refrigeration, chemicals, preservatives, or additives!
You can prepare everything in your back-yard (or balcony) in one afternoon and it will be more relaxing than taking the day off to go fishing.
– You’ll learn how to get rid of the toxic canned food from the supermarket… and preserve your own healthy & delicious vegetables and fruits using Granddad Bob’s secret canning trick that instantly kills bacteria and parasites…
… and guarantees 100% healthy & safe food for your family following the long-lost preservation method that completely eliminates ANY toxic preservatives… while keeping your food in perfect condition, with all nutrients and vitamins intact, up to a full year.
– You’ll never run out of the world’s TASTIEST foods once you learn the three simple steps to making your own cheese, butter & probiotic-rich yoghurt… easier than you make a cup of coffee!
– You’ll be making eggs, the riskiest food in your diet, last for up to one year without using any electricity… just by learning the secret preservation method my granddad uncovered in South America.
– Not only that, but you’ll be growing the top 3 nutrient-packed, medicinal and tasty mushrooms at home with almost zero costs… even if you live in a cramped studio…
…that means you’ll stop spending your money on those moldy, tasteless mushrooms at the store.
And when all that mouth watering eating is done… you won’t have to worry about spending your hard-earned cash on nasty detergents and soaps because…
– You’ll be saving over $82/month with a bagful of chemical-free household products like soap, detergent & glue, that anyone can make in their bathroom sink… And I’ll show you how to make them in just under 12 minutes.
All that is just a fraction of the incredible things my granddad taught me… things I tirelessly worked on simplifying your life…
You can get your copy with 3 free special bonuses HERE
WHAT TO READ NEXT:
5 TECHNIQUES TO PRESERVE MEAT IN THE WILD YOU SHOULD PRACTICE
HOW TO MAKE YOUR OWN BACON (STEP BY STEP GUIDE)
A RETURN TO THE OLD PATHS: HOW TO MAKE PEMMICAN LIKE THE NATIVE AMERICANS
20 LOST RECIPES FROM THE PIONEERS: WHAT THEY COOKED ON THEIR JOURNEY WESTWARD
SEVEN CLASSIC GREAT DEPRESSION ERA RECIPES GRANDMA USED TO MAKE
POTTED MEAT: A LOST SKILL OF LONG TERM MEAT STORAGE
BACK TO BASICS: HOW TO MAKE AND PRESERVE LARD
THE BEST WAY TO STOCKPILE VEGETABLES OFF-GRID
OLD FASHIONED PRESERVING-GRANDPA’S RECIPE FOR CURED SMOKED HAM
HOW TO MAKE GUNPOWDER THE OLD FASHIONED WAY
SURVIVAL HERBAL RECIPES FROM OUR ANCESTORS
HOW TO PRESERVE MEAT FOR SURVIVAL LIKE OUR GRANDFATHERS
OTHER USEFUL RESOURCES:
The 3 Pioneer Survival Lessons We Should Learn
The Most Effective Home Defense Strategies
Old School Hacks for Off-Grid Living
The Medical Emergency Crash Course


