Let me just start out by saying that I spent hours pouring over other peoples’ videos and recipes to learn how to can bacon. I tried them all out and found them sorely lacking. I then proceeded to can about 20 pounds of bacon on my own to come up with the perfect canned bacon, which in my opinion just didn’t exist…until now.
And canning bacon is worth the effort. It’s a great way to make your own customized flavored bacon with ease, and it’s just handy to have pre-cooked bacon on-hand for recipes and snacks. It’s great while traveling or car-camping, and it’s nice to have canned bacon when the electricity goes out, or the weather makes it impossible to make it to the store.
All the recipes and methods I found for canning bacon involved taking strips of raw bacon, slapping them down on parchment paper, rolling them up tight, jamming the role into a quart-sized jar, and canning for 90 minutes. I tried this method and it missed the mark for several reasons:
- While the bacon was cooked through it didn’t look cooked and it didn’t act cooked. It looked close to being raw, with the color of the meat and fat resembling what it did before it was put into the jar. It also remained limp. So while it was technically edible, it wasn’t appetizing.
- To get it remotely close to being appetizing, after prying the canned bacon from the jar you had to fry it in a pan to crisp it up. But I found that taking the bacon straight from the jar to the frying pan caused a lot of popping and general grease rebellion. The moisture build up in the jar caused by the canning process just didn’t mix well with frying bacon, and the bacon didn’t fry up the same as raw bacon, either.
- The jar was full of bacon grease but it also had moisture mixed in with the grease,which just made the grease more of an annoyance than a useful ingredient with which to cook other dishes. You really had to scrape the grease off the bacon, or wait to fry all the bacon up at once to gain access to the grease. It just didn’t work well. Trust me on this.
- After the canned bacon was removed from the jar, I found that it fell apart readily in the frying pan while trying to crisp it. So I was left with parts of bacon strips instead of strips.
- In short, it was a pain in the ass.
I wanted my canned bacon to meet certain criteria so I could eat it with the most enjoyment and least amount of hassle, and use it in recipes to the best possible advantage:
- I wanted it to look and taste awesome straight from the jar.
- I wanted it to retain the crisp and caramelized goodness that comes from fresh-fried bacon.
- I wanted to be able to use it immediately in recipes and as snacks without having to cook it again.
The secret to meeting these criteria is to fry the bacon before canning. This solves all of the above issues, plus it allows room to include enhancements with the canned bacon, including making bacon bits ready for recipes and making flavored bacon. Here’s what I did for each:
.
(Note: Make sure you follow the pressure canning guidelines found at the National Center for Home Food Preservation called ”Selecting, Preparing and Canning Meat: Strips, Cubes or Chunks of Meat” found here. You cannot safely can meat without a pressure canner and canning bacon, though it is done often, is not recommended so you need to decide for yourself if you want to do this. Many can bacon strips without problems.)
.
CANNED BACON STRIPS
.
Here are step-by-step instructions for the process:
.
One pound of thick-cut bacon fits perfectly into a pint-sized, wide-mouthed jar (this will likely hold true for regular bacon, too). Weigh the bacon raw. Before cooking you will need to cut the bacon strips in half so they fit in the jar, but I find this to be a benefit after opening the bacon instead of dealing with full strips. The half-strips are easier to manage for recipes and they are easy to throw in a frying pan for a quick heat-up. Also, opening a pound of bacon at one time is sufficient; if you used a quart-sized jar you’d likely have to deal with two pounds of cooked bacon at once, which seems like a lot to handle at one time.
.
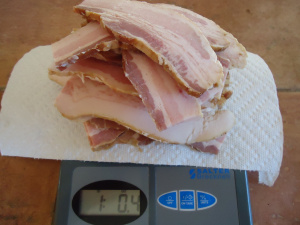
Weigh about 1 pound of bacon for a pint-sized, wide-mouthed jar.
.

Fry the bacon in a skillet on medium heat until almost cooked through. It will continue to cook after you remove it from the pan and you don’t want it to be over-done. Remember that you’ll be pressure canning this bacon for well over an hour and while that cooking won’t contribute to the browning of the bacon, it will cook it a bit more.
.

Fry the bacon until almost cooked through.
.
After your bacon is cooked, lay it on a plate with some paper towels to soak up the extra grease. While it is draining, cut a 24″ piece of brown parchment paper and lay it on your counter. Lay your bacon strips out on the paper as shown below. Notice that there are several inches of paper left at the end — this will ensure that your bacon is nicely tucked in while you roll your bacon package. If you use thin-cut bacon you will have more slices of bacon to put on the parchment paper. It’s ok to overlap them on the paper. You just want to make sure that you still leave about 3″ of paper at the end.
.
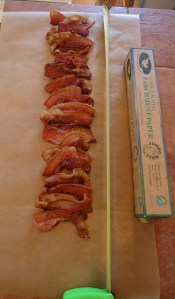
Lay your bacon on 24″ of brown parchment paper.
.
Now it’s time to add any desired flavoring to the bacon. Two of my favorites are Tabasco sauce and 100% pure maple syrup. For the Tabasco sauce, just take a bottle of Tabasco and sprinkle it liberally over the bacon. Have a really heavy hand with this — if you want Tabasco bacon why go half way? For the maple syrup, it’s important to only use 100% pure maple syrup; synthetic syrups just don’t stand up under the rigors of pressure canning. I use Grade B syrup and it works great and is easier on the budget. Make sure you brush plenty on to the bacon here, too.
.
You can consider other flavorings for your bacon besides just maple syrup and Tabasco sauce, including brown sugar, chili powder, cayenne pepper, dried thyme, dried basil, cinnamon, or a mixture. For dried herbs and spices, just sprinkle them liberally over your bacon before rolling.
.
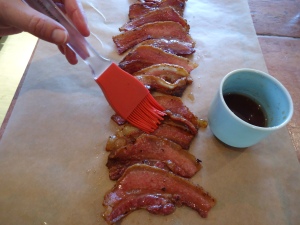
Now you can add flavors to your bacon. Here I’m giving the bacon a 100% pure maple syrup wash.
.
Now it’s time to start packaging your bacon for the jar! You’ll notice that the width of the parchment paper allows you to fold it in thirds around the bacon. Just take both sides of the paper and fold them around your bacon. Use your hands to press the paper lightly around the bacon to ensure that the sides are creased in preparation for rolling the bacon.
.
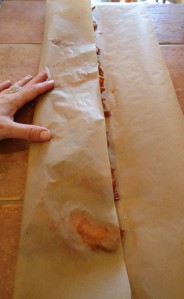
Fold the parchment paper in thirds over your bacon.
.
When you roll up your bacon, start at the end that has the bacon closest to the edge of your parchment paper. When you start rolling, make sure your first few turns are nice and tight. The bacon almost rolls itself, but you do need to guide the parchment paper, ensuring that the folds remain in tact. You want your roll to be firm, but don’t smash the bacon. There’s no need for that and why do you want to punish perfectly good bacon in that way? You’ll notice that when you get to the end of your roll that the extra paper left when you laid your bacon strips on the parchment paper secures your bundle.
.
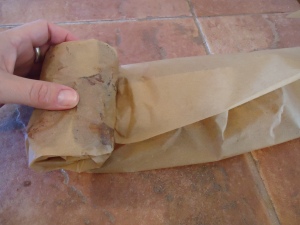
Roll your bacon up nice and tight, without smashing your strips to smithereens. You should love your food, not torture it.
.
Your roll of bacon will look adorable, and it will fit neatly into a wide-mouthed, pint-sized canning jar, which you have already sterilized and prepared for canning .You might need to nudge the roll in the jar a bit, but you should not have to jam it into the jar; if you do your parchment paper will tear and your bacon will be crying out in agony. This is the reason it’s so important to use a wide-mouthed jar; a narrow-mouthed jar will obviously cause problems when you try to insert your roll. If you find it is too hard to push the bacon into the jar, unroll it and remove a few pieces of your bacon, re-roll your bundle and try again until it fits snugly but is still easy to insert into the jar.
.
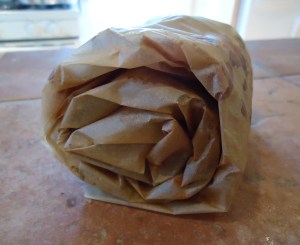
A completed roll of bacon, ready for the jar.
.
Place a lid on your jar and it’s ready for pressure canning (see below.)
.
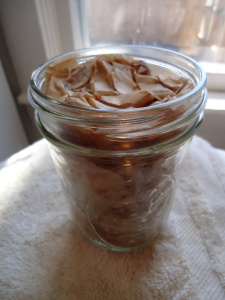
The roll fits neatly into a pint-sized, wide-mouthed jar.
.
CANNED BACON BITS
.
To make a jar of bacon bits, take your raw bacon and cut it (kitchen scissors are easiest) into large pieces about 1″ square. Cook through and place into your jars; it’s not necessary to use parchment paper when canning bacon bits. Before placing them into the jar you can add flavorings like pure maple syrup, Tabasco sauce, brown sugar, pepper, or herbs like thyme or basil. Screw the lid on and pressure can (see below).
.
PRESSURE CANNING
.
Now it’s time to pressure can your bacon. You’ll need to process your meat following the times and pressure guidelines presented in “Selecting, Preparing, and Canning Meat” found
here.
.
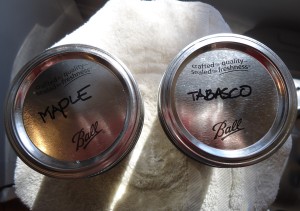
Make sure you label your cans of bacon with a sharpie before putting them in the pressure canner.
.
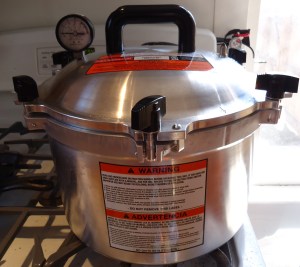
Follow standard protocol for pressure canning meat.
.
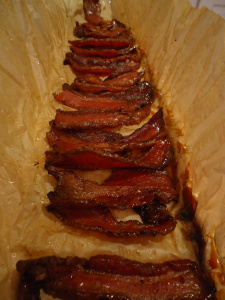
Maple syrup bacon, pressure canned and pulled from the jar the next day.
.
USING YOUR BACON
.
Now is the fun part. After you open the jars of pressure-canned bacon there are different things you can do:
.
- Eat it right out of the jar. It will actually be difficult to prevent yourself from doing this. Bacon will disappear before your eyes, I guarantee it. Be ready to take on a strict running regimen to keep up.
- Use the bacon bits in all manner of dishes, straight from the jar. From salads to casseroles to soups, and even as an ingredient in breads and corn muffins, the bacon bits can’t be beat when it comes to cooking versatility.
- The bacon strips can be used in a similar way, but are great for sandwiches and to enhance other dishes, such as laying strips between pieces of fish, or as a tasty ingredient in tacos. The possibilities are endless!
- Reheat it for breakfast. This is a no-brainer…it’s bacon.
- Take your canned bacon camping with you. The jar might weigh too much for backpacking, but for car camping it’s a dream!
- Stockpile canned bacon in case of emergencies such as electrical outages or heavy storms when you can’t make it to the store.
- Accept the inevitable accolades from friends and family.
Want more old, almost lost recipes our grandmas used back in the day? Than you need this book, Old Time Wisdom. Get your copy HERE


Yep, we do that too! Look at the last pick and you’ll see the fat difference in raw pack vs cooked. We’ll never raw pack again. The end result still has to be cooked.
http://gardenforyourlife.blogspot.com/2013/08/just-to-prove-that-you-can-can-anything.html
Why use bacon slices for your bacon bits? Buy the boxes of bacon ends and pieces that are in your grocery store. Just cut them up with your kitchen scissors and cook. Much easier on the budget. My favorite way to use the bacon bits are in breakfast burritos.